Disclaimer: This post contains affiliate links which means YBC® may earn a small commission, should you happen to buy through our links. Thanks for the support.
Today’s post is written by Dan. Also, today is the last day to enter to win our Back to School Giveaway!
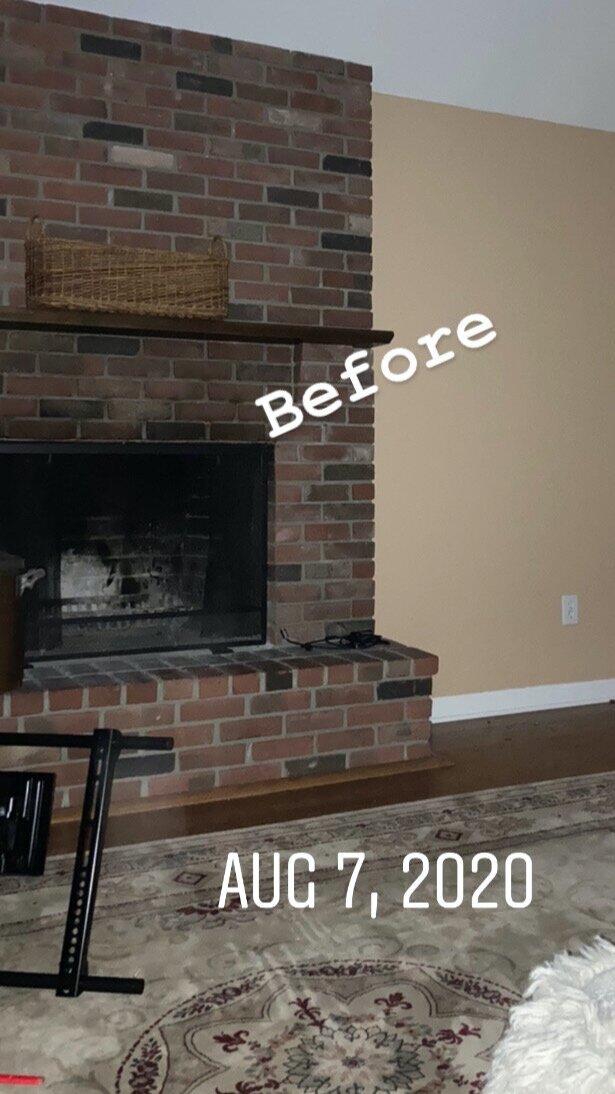
Candace and I purchased our new home about a month ago. Once we signed the papers, we got to work. Our house is a center hall colonial, and it seemed to peak in the 90’s. In short, it needed a face lift. The layout is doable and the basics are solid; floors, roof, HVAC, foundation. We have been working on little projects here and there, you may have already seen the home gym from Candace’s Instagram. Next up was our great room. This is the room that sold us on the house. It is large room with a high, vaulted ceiling and tons of natural light. It comes off the kitchen and is highlighted with a full brick floor to ceiling fireplace. The problem is that the brick was no good and the mantle was worse. See below.
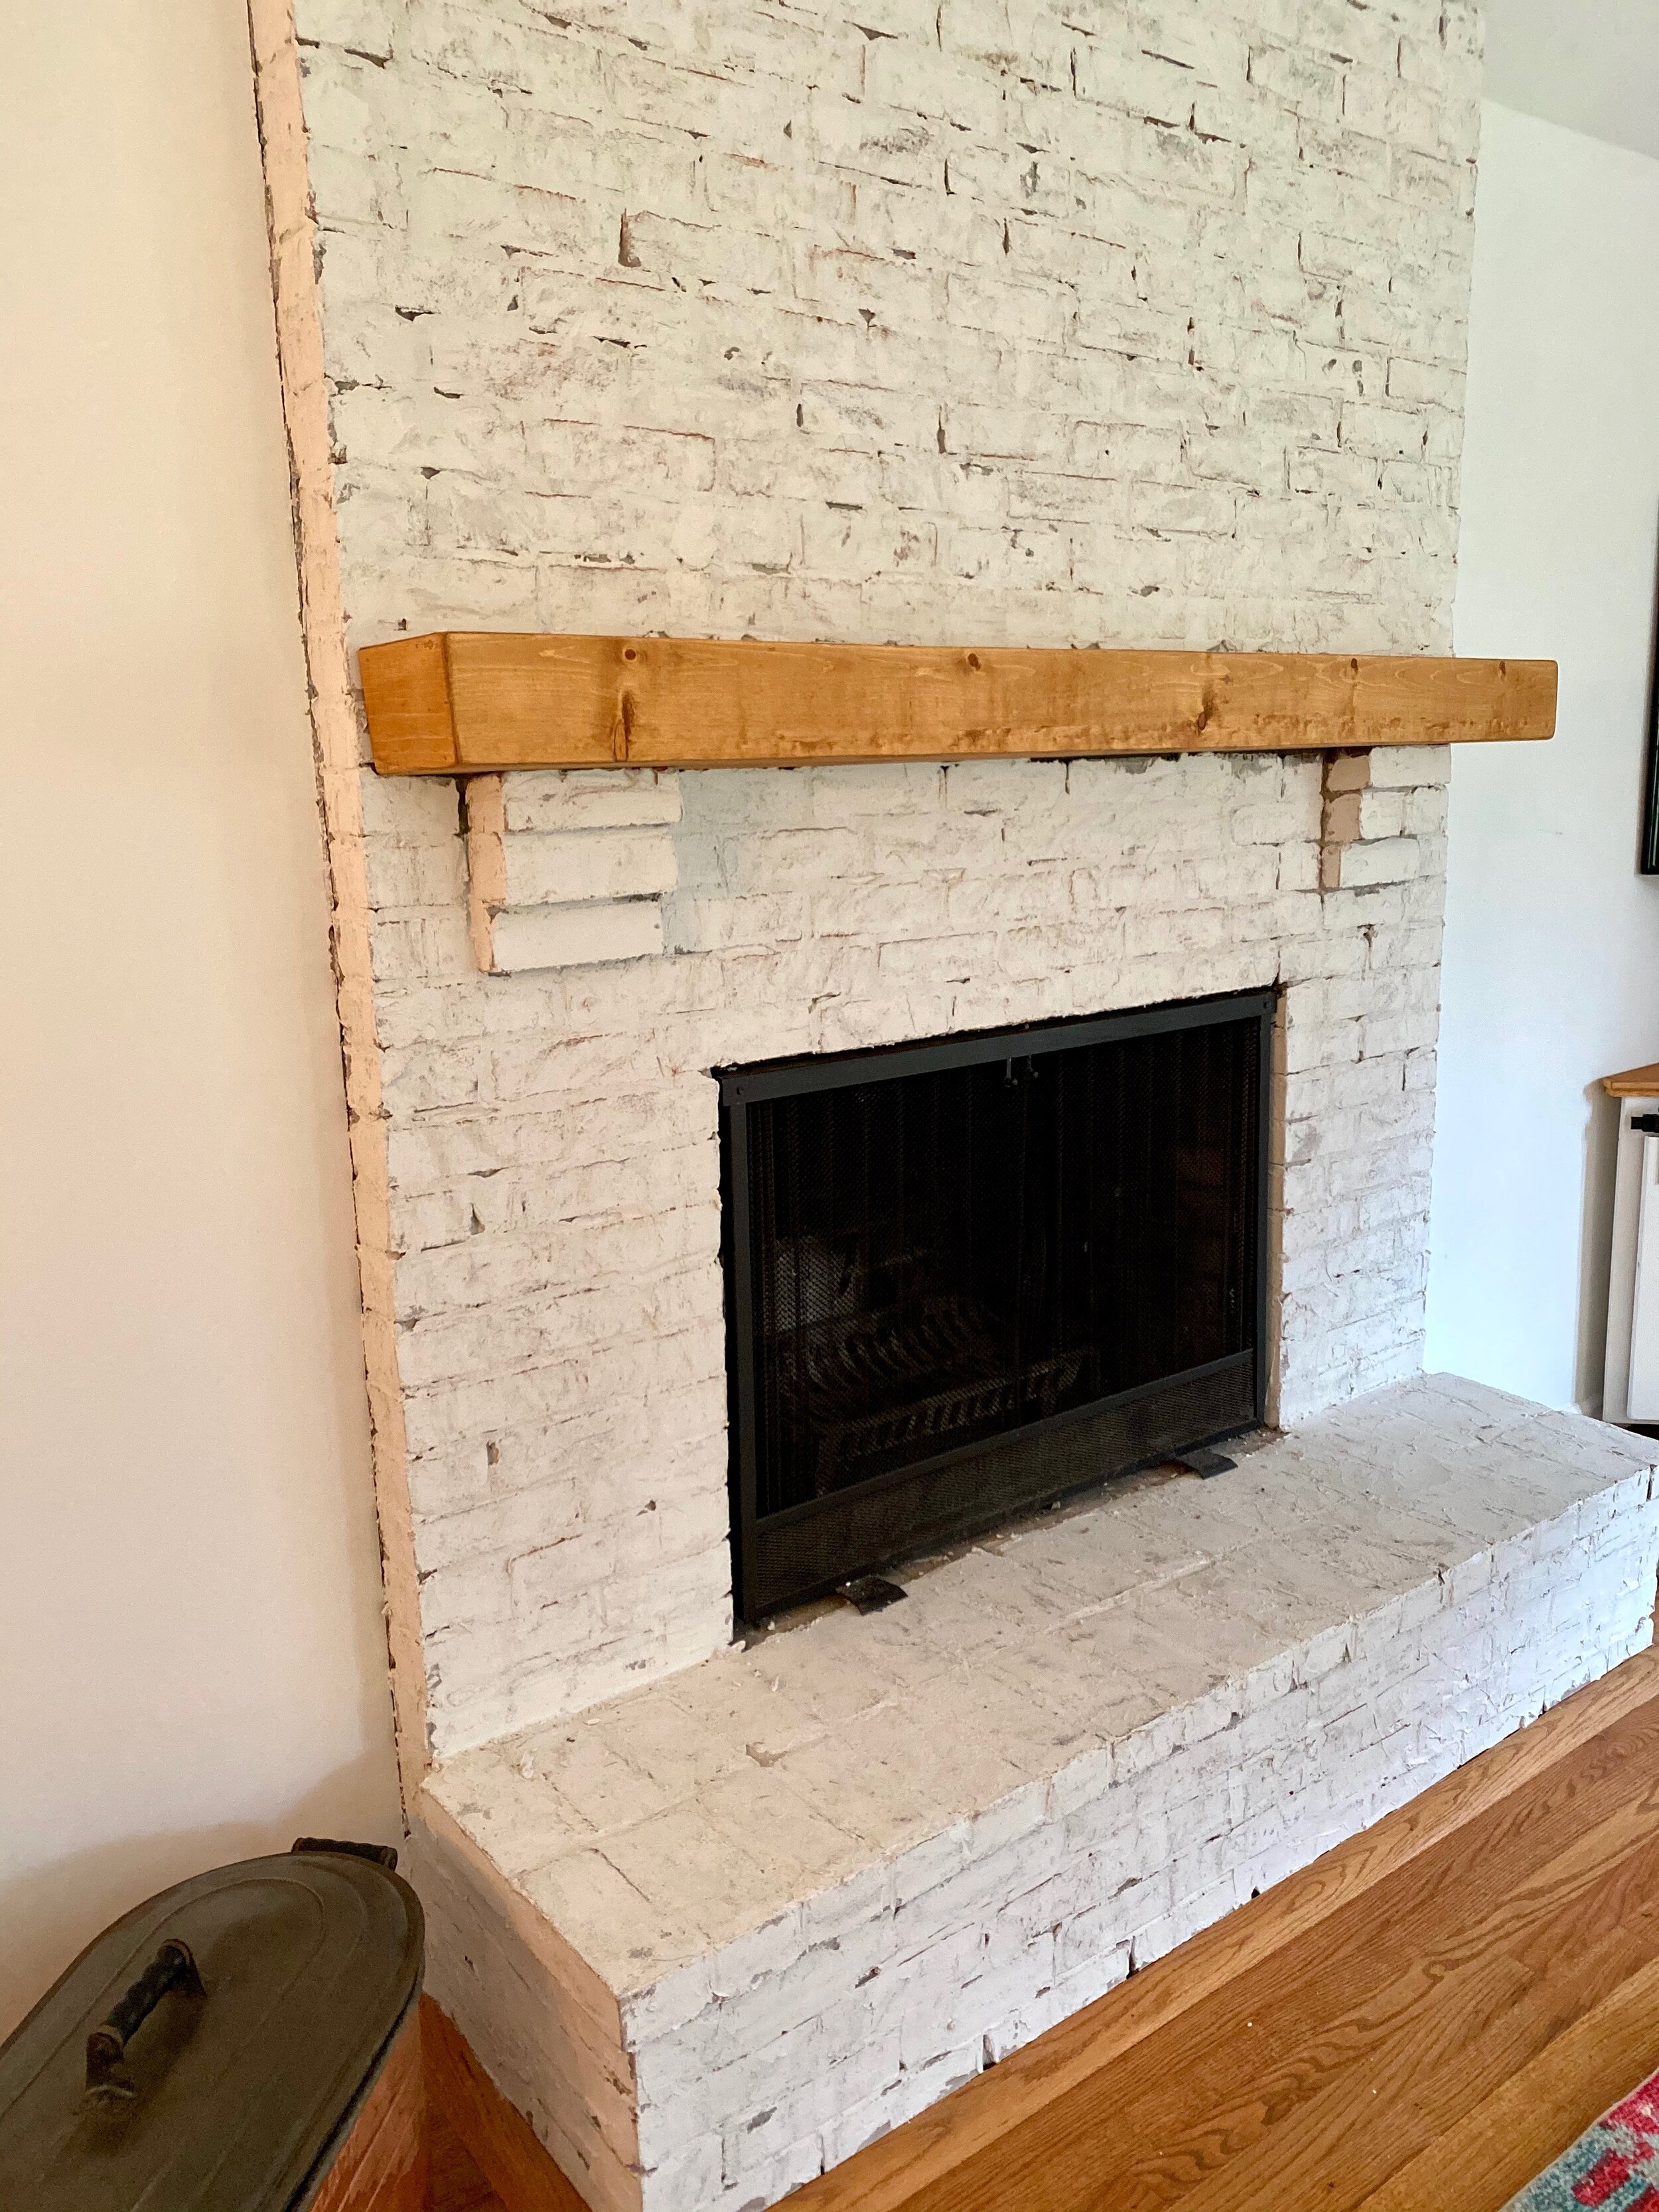
We did a German Schmear on the fireplace to lighten it up (we literally just googled “How to German Schmear, watched a few videos, realized you can’t really do it wrong and went for it). It came out great, which meant it was time to do the mantle.
A mantle is a staple of a room like this. It is the focal point of the room, so it needed to be well done. We are going for a rustic, modern farmhouse with hints of boho and industrial in there as well. There are a few ways to get a mantle that fits your needs. The first, fool-proof way is to purchase it. Reclaimed barn beams are in right now. The problem is, they are very expensive. Candace looked into a custom made mantle made with reclaimed wood, but it was around $700. If you can afford it, they are well worth it. They are hand hewn and look nice. The issue is being able to install them. You need to be super careful that you don’t just nail and screw anywhere, as it will ruin the look. The next option is to order a faux barn beam. These are cheaper, and for good reason. Their markings are not natural and are more factory looking. They come with easy to install brackets and instructions, but it just doesn’t have the same feel. Option 3, wing it. I chose option 3.
This is not a plan or a template post that you can follow step by step. There are a million of those out there and they are all better than I could ever replicate. This is just me explaining my thought process as I build our mantle.
The first step was to remove the old mantle- it was just held up with a few nails. Inside the brick was a 2x4 on the flat as a nailer. This was a big plus. If you don’t have wood built in to the fireplace, no worries. Concrete screws are super easy to use. But you’re going to need some sort of nailer on the brick to affix the mantle to. I used timberlocks and screwed another 2x4 to the fireplace that was just short of my mantle length. Our fireplace is 72 inches wide, and my mantle was 71 inches wide, so my 2x4 nailer was 68 inches wide. I didn’t want the mantle to run end to end, so I left a half inch on either side. This is the benefit of winging it. You get to create it any way you want. You are not bound by the dimensions of whatever it is you are buying.
The next step is to build the mantle. I bought 1x8 pine. I bough 4 six foot pieces, each piece was $11. That’s it. That is all the wood you need, aside from the nailer which I had laying around. Once you have the wood, you are going to need some tools. You need a table saw, chop box, compressor/nail gun, sander. Now, if you do not have the tools then this is going to be costly. Tools are expensive. Luckily my father is a general contractor and has everything, so I borrowed some of it, and other tools I had already invested in. Aside from the tools above you will need a level, drill, tape measure and other basic hand tools.
Ok, so now you are set and ready to go. You know the phrase measure twice, cut once? Well, that is your whole thought process whenever you build. And it is more like: measure a million times, then cut once. One wrong cut and it can cost you money and time. So make sure you are 100% positive you want to cut whatever it is you’re cutting.
The first piece I cut was the face of the mantle. I looked at the four boards I had and found the one that looked the best. It had a good amount of knots in it and some other grainy type striations that I thought would look cool. We decided to stain our mantle which makes it more important to pay attention to the wood. If you are painting it, then no worries, the paint will cover everything. Once I had the piece I wanted I had to decide how thick I wanted the mantle to be. This is all preference, but I went with 4 5/8. At this point I had to cut a 45 degree angle the length of the piece of wood on top and bottom. Essentially I am making a neat little trough. See below.
In order to get that look, you need to cut 45 degree angles all around, then glue and nail it all together. I know that sounds simple and may not help much, but that is really just it. Make sure to glue it all and add as many nails as you think you need. Once you have the wood cut and nailed, now it is time to sand, sand, and sand some more.
You really can’t sand it enough. It all depends on the look you want. We wanted a rustic look, so we can tolerate more disfigurations. It is not a sleek modern, streamlined mantle. Nicks and marks and bumps are welcomed. Make sure to fill all the nail holes and open cuts with wood glue. Let that glue sit for a few hours.
Once it is done and sanded and you are satisfied with the look, then it is time to stain. Again, this is all preference and even more reason to DIY. You are in control of the color and the application. We chose a walnut stain that we thought would match our floors and continue to lighten up the room. You can’t really go wrong, just make sure you test your stain on some scrap wood before you go for it. Let it dry too, stain looks different once dried. We put on a few coats to darken it up a bit and it came out great.
Once you have the mantle, you simply slip it in over the 2x4 nailer we put up earlier. It only takes one or two screws to hold it in place. We put the screws in top towards the back to hide them as much as we could. Here is the final look.
So, there you have it. Quite the difference from a month ago! We love it. Please feel free to reach out to me if you need any help. I would always advocate for doing things yourself, it is not as hard as it looks. You just need to tools and motivation to get it done. The benefits of doing it yourself are worth it. Now, every time I sit in that room and look at the mantle, I know that I built it. It just feels good.


