PSA - We're down to the last subscription boxes - pre-order yours now and discover the best new items in the health and wellness industry. Also, if you're local to Hartford, Connecticut, come join us for an arm balance workshop!
I consider myself super lucky to have a husband that enjoys cooking. Well, maybe "enjoys" isn't quite the right word, but we are very different cooks. I cook, and while I think I do a good job, I am not exactly a clean-as-you-go type of person. No matter how hard I try, it always looks like a bomb went off afterwards.
Greg
Greg, on the other hand, is a natural clean-as-he-goes kind of cook and he always jokes, "I cooked, so you need to clean," as he hands me my plate of food (the kitchen is always pristine). Whenever I try to help in the kitchen, he kicks me out because I just make too much of a mess. I'm not complaining. :)
So anyway, when he offered to do a post on yogurt, I jumped on the chance because I seriously eat this stuff every single day and when I'm traveling, I miss it so much. There's nothing quite like homemade yogurt and I promise that once you make it, you'll never want store-bought again.
What's interesting, is that in the GAPS book, it says that most store-bought yogurt is fermented for about four hours, which isn't really enough. Letting it ferment overnight when you make it at home is much more preferable because it yields a higher probiotic count. It's super healing, full of good bacteria for the gut and tastes delish, so it's a win all around. Hope you enjoy Greg's guest post. xo Love from Greece, where I'm finishing up my yoga retreat.
Items needed for homemade yogurt:
Ingredients for homemade yogurt:
Whole Milk (preferably not homogenized and not pasteurized but not necessary)
Step by step directions:
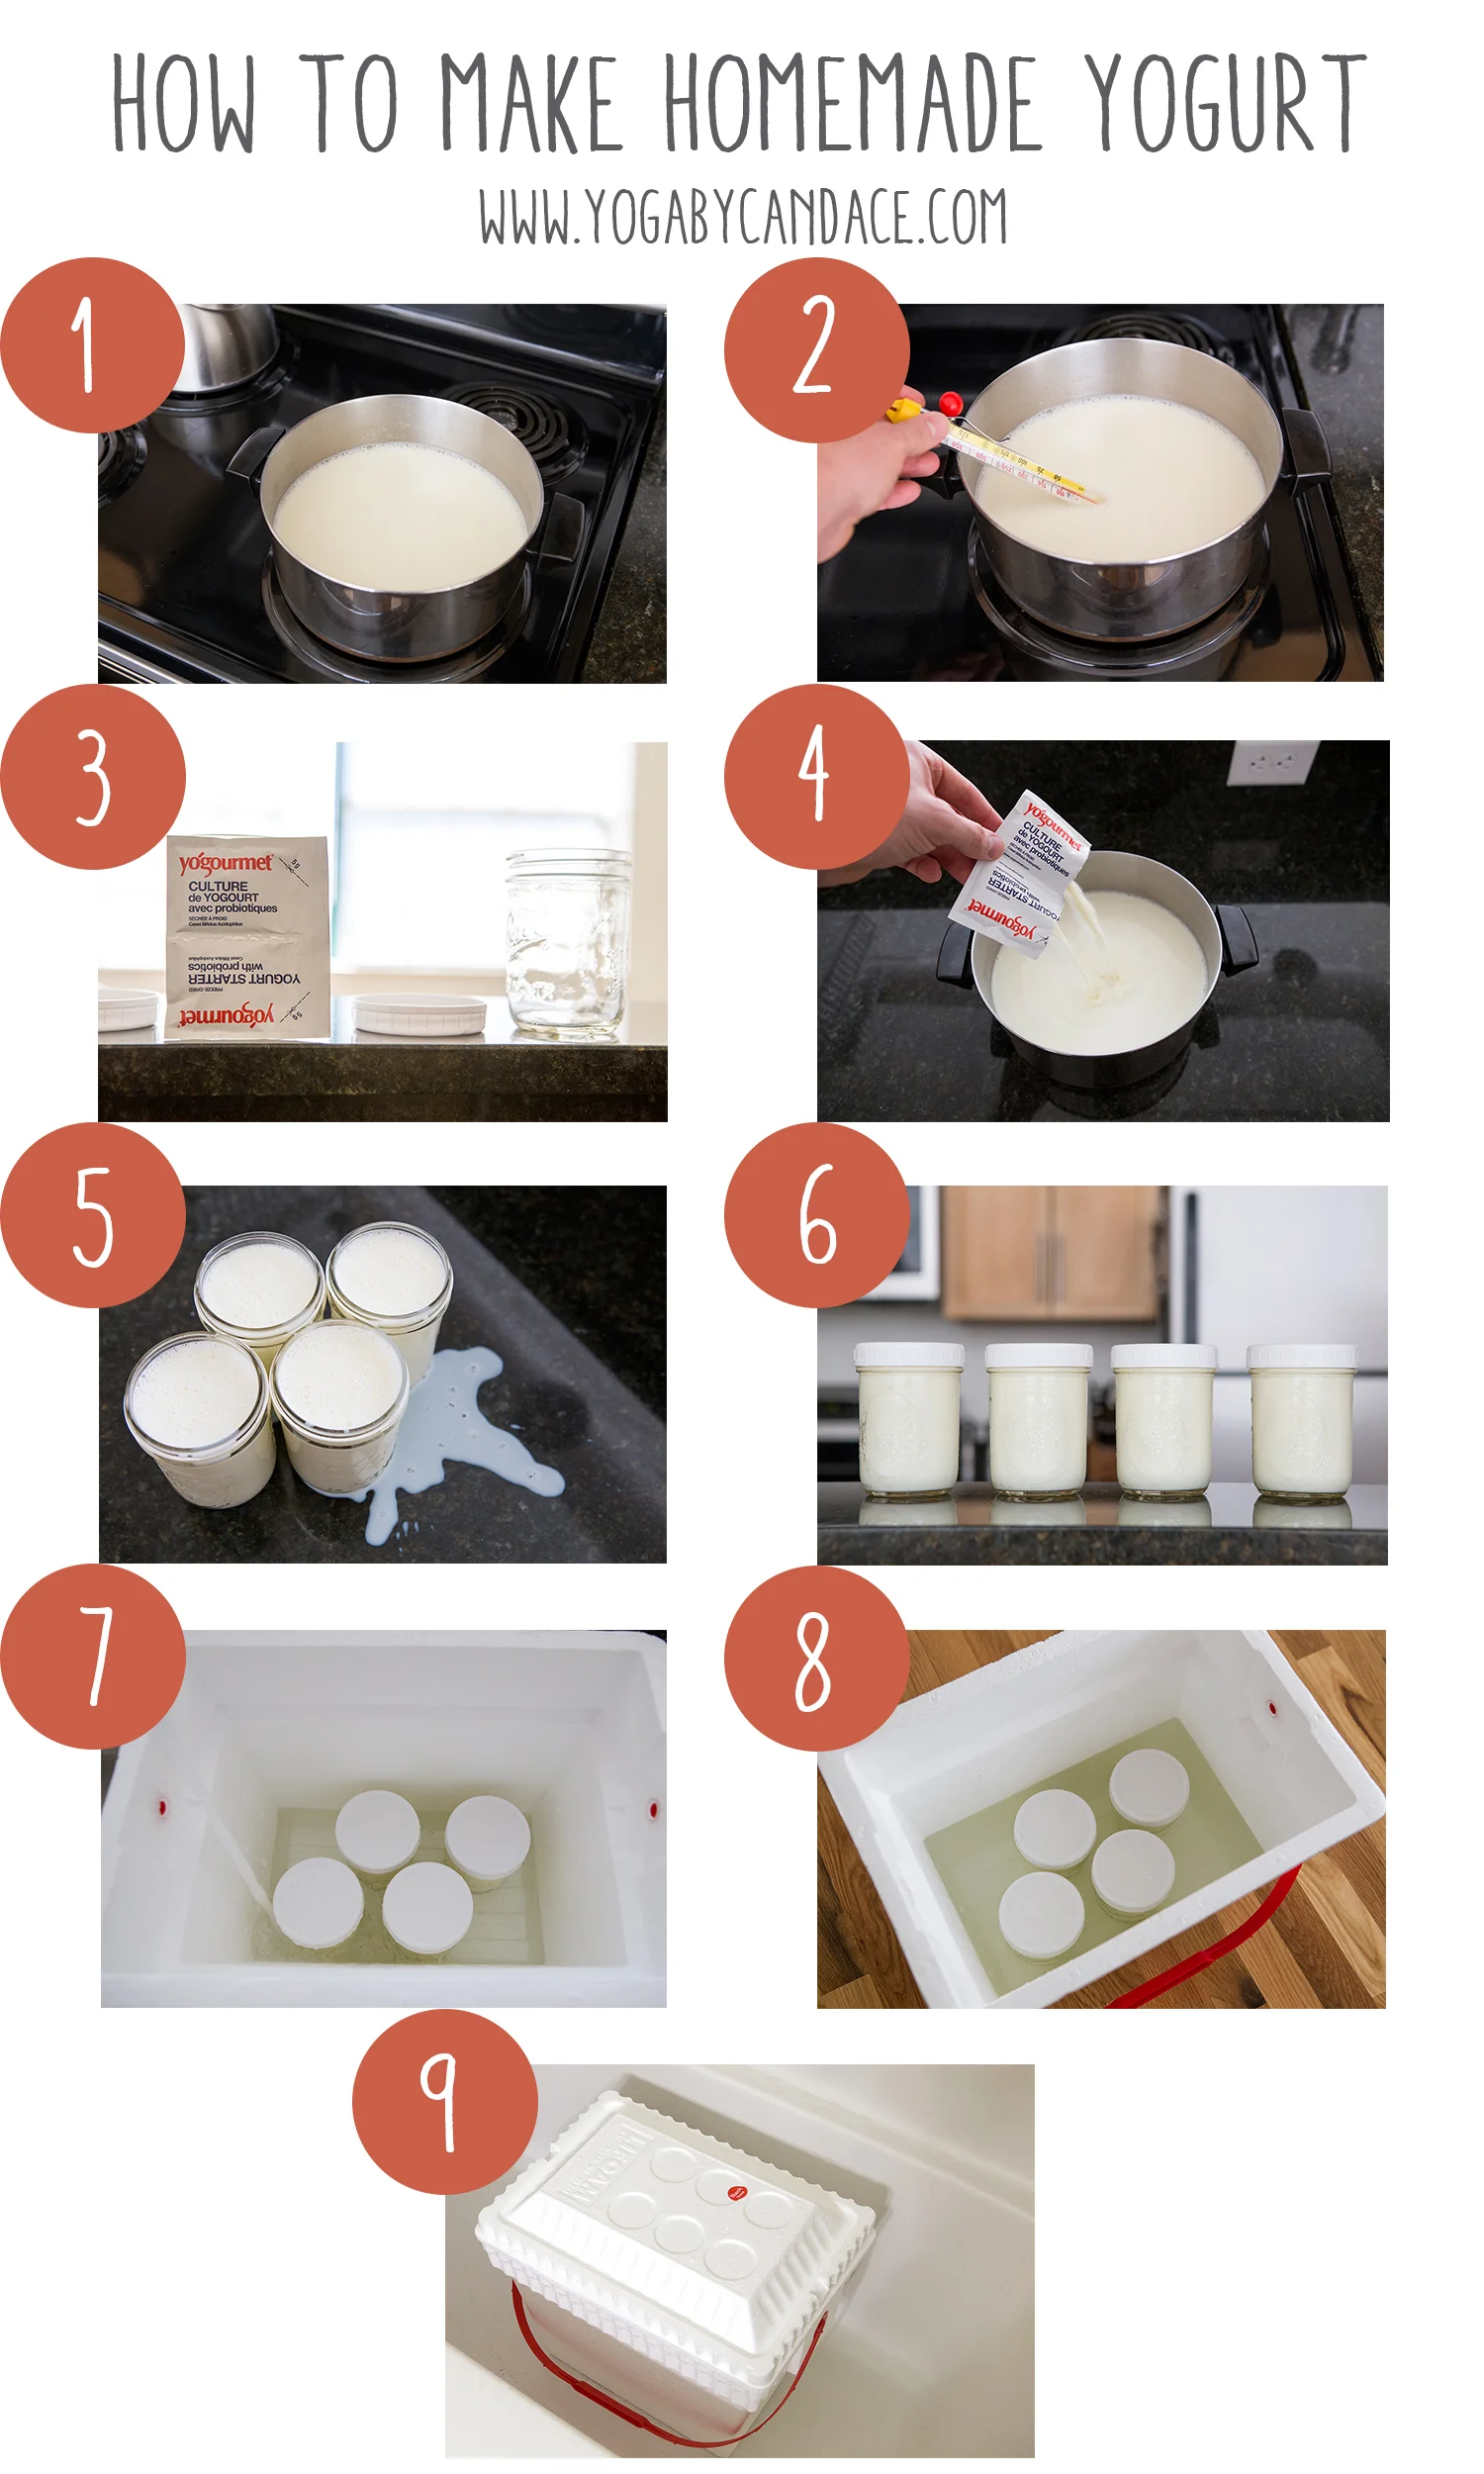
1. Bring milk slowly to a boil or at least 185 degrees fahrenheit. Stir to avoid a skin forming. If it's heated too fast, the milk on the bottom of the pot will burn and leave unpleasant brown chunks in your yogurt, haha. No one wants that. Be sure to keep a close eye on the milk when it comes close to boil because it will rise fast and spill over the edges leaving a not-so-fun mess to clean up. (Insert joke about crying over spilled milk here!)
2. Once the milk has come to a boil, take the milk off the burner and let it cool down to 115 degrees fahrenheit before mixing in your yogurt culture starter packet. I use a glass thermometer to measure the temperature of the milk. Again stir while it is cooling to avoid skin forming.
3. Get your culture starter out.
4. Once your milk has cooled to 115 degrees fahrenheit then you can mix in the yogurt culture starter. We used Yogourmet as our culture starter. The reason for waiting until it reaches 115 degrees is so when you mix in the culture, the temperature of the milk doesn't kill it culture. Read the culture starter instructions to ensure you add the right amount of culture for the amount of milk you are using.
5. Now that you have mixed in your culture packet into the milk, you can now poor your milk into your mason jars and secure the lids. Remember to pour carefully like I did in the images. :)
6. We use plastic lids with our mason jars to prevent corroding.
7. Fill a cooler with hot water from your facet and place your mason jars into the cooler.
8. The fill water line is to the base of the mason jar lids.
9. Put the lid on your cooler and place in a safe spot overnight. The yogurt should sit in a dark warm place for 8-12 hours.


